Create Rules By Using the Flex Processor Rules Manager Dialog Box
The Flex Processor Rules Manager dialog box can be used to create rules to cull and manage the data set.
|
|
Note: Alternatively, you could use the Flex Processor Rules Manager Wizard to create your rules. The wizard provides a simplified, step-by-step process to help you create rules that will cull and manage the data set. The wizard has the same rule options, displayed on separate screens. For more information, see Create Rules By Using the Flex Processor Rules Manager Wizard. |
To create a rule using the Flex Processor Rules Manager dialog box. Click the sections below for more information.
![]() Define the Basic Action and Scope of a Flex Processor Rule
Define the Basic Action and Scope of a Flex Processor Rule
-
On the Filtering tab, in the Case (Project), Processing Job, or Data Extract Job Options dialog, click on the
 button located at the bottom of the dialog.
The Flex Processor Rules Manager dialog displays.
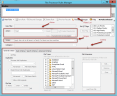
The dialog is split into several sections:
- Rules List: Provides a list of all of the rules defined for the Case (Project) or Job you are currently configuring.
- Action: The action to be taken on the documents that meet the criteria. Only one Action is allowed per rule.
- Criteria: Determines which files this action applies to.
-
Scope: Specifies how the rule is applied to the files that meet the specified criteria.
-
To create a new rule, click
 . This button activates
the new rule for criteria selection. If the drop-down arrow is clicked to the right
of the New Rule button, two options appear: New Rule and New Search-In-Results
Rule. For more information about the differences between and New Rule and New Search-in-Results Rule, click
. This button activates
the new rule for criteria selection. If the drop-down arrow is clicked to the right
of the New Rule button, two options appear: New Rule and New Search-In-Results
Rule. For more information about the differences between and New Rule and New Search-in-Results Rule, click  here.
here.Search-In-Results Rule is used to create a new rule that is dependent on one or more selected rules. Search-In-Results rules allow refined filtering scenarios. For example, Rule1 will select all documents with the responsive term “criminal”, and then SubRule1 will search within Rule1 to placeholder Excel documents with the responsive term “money.” Essentially, Excel documents with the words “criminal” and “money” will be placeholdered.
The Search-In-Results Rule Options are:
-
Applies to Results of All Previous Rules - The “catch-all” rule for all documents selected by upper rules. Example: placeholder unknown file types.
-
Applies to Results of Selected Rule - Refined criteria/action for only documents fitting criteria of selected “parent” rule. Example: keyword search on documents in a date range. Note: This option is not available if the selected rule is a De-duplication rule. In addition, de-duplication options will not be available when creating a rule that is one of these child rules.
Caveats for Search-in-Results Rule Options are:
- Any rule with an action to remove documents will not be allowed to have any child rules. However, a rule with an action to remove documents can be set as a child rule.
- Rules will only move within their level when reordering rules in the list.
- Tree hierarchy will be used to display the level of dependent rules. For example, Level 0 represents a parent rule. Level 1 would represent the child rule for Level 0. Level 2 would represent the child rule for Level 1. The following hierarchy of rule examples levels are shown here:
-
Image - Search 1
- Image - Search 2
- Placeholder - XLS
- Image - Privilege Search
- Image- PPT Max 20
- Image - Search 2
- Image - Search 3
Rule ID: Action - Rule Title
-
-
Enter a title for the rule. You must define a (unique) Rule Title to reflect the Action and Criteria. If you choose a Placeholder Action, the Rule Title will display on the created placeholders. A Rule Title can be a full page or narrative. A maximum of 750 characters is permitted.
-
Define an Action for the rule. The Actions available to be taken on the data in the collection vary depending on whether you are creating a rule at the Case (Project) level, or for a Processing Job or Data Extract Job. For more information about actions available for Cases (Projects), Processing Jobs, and Data Extract Jobs, click
here.Case (Project) Specific Actions
-
Action: The action to be taken for items that meet the rule criteria at the Case (Project) level.
- Produce
- Placeholder
- Remove
When creating rules at the Case (Project) level, a Max Pages Threshold Limit may be set for the Produce action. When the Max Pages Threshold Limit is set, the number of pages imaged for certain documents is limited to the limit value. For example, if the limit is set to 3, during imaging, and a document has more than 3 pages, the imaging will only take place for the first 3 pages of the document. When a max pages threshold limit is specified, one of two text handling options may be selected:
- Truncate Text to Max Pages
-
Retain all Text for Document

Note: The max pages threshold limit is ignored for Data Extract Jobs that are created under the same Case (Project).
By default, the option Create Placeholder is selected and may be cleared if required for the rule.
Processing Job-Specific Actions
-
Action :The action to be taken for items that meet the rule criteria at the Processing Job level for the selected case (project).
- Image - Converts the files to image format.
- Convert to PDF - Converts documents to text-based PDF files that are PDF/A compliant. Uses dynamically created PDF print drivers (PDFCreator). Documents will be converted via PDF-XChange drivers and single page PDFs become the intermediate output. This option differs from Image which uses Black Ice™ drivers and produces images as the intermediate format. Exceptions are native files which are already in an image format. These files will continue to use Lead Tools for processing. For information about PDF/A compliant files, visit http://www.pdfa.org/doku.php.
- Placeholder - This is useful for media files such as .WAV files. To customize the placeholder, click Select metadata fields. This opens the Custom Placeholder Configuration dialog.
- Placeholder with Document Text - Creates image placeholders but includes the original document text. To customize the placeholder, click Select metadata fields. This opens the Custom Placeholder Configuration dialog. For more information, seeCreate Custom Placeholders for Processing Jobs and Cases (Projects).
- Remove - Removes the document from the results
-
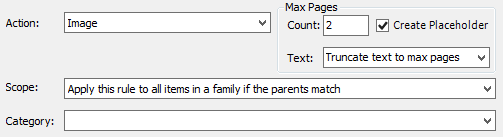
For Image and Convert to PDF Action Types
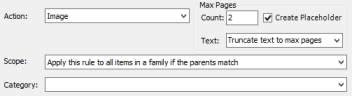
- Max Page Count: Used to set a threshold for the total amount of pages to be produced for any one document related to the rule. Blank page removal is applied prior to considering the page as part of a document when Remove Blank Pages is selected in the General Processing Options screen. For example, a 12 page document that has 5 blank pages removed will not be flagged as Threshold Exceeded if Max Pages is set to 10.
- Text drop-down menu: Select one of two options
- Truncate text to max pages - text is truncated to match the output of pages that fall under the threshold (existing behavior).
Retain all text for document - document text is associated to the number of pages below the set threshold value and all subsequent pages are blank.
- Create Placeholder: This option is enabled by default. It determines if the slipsheet is printed when any Max Pages limit is exceeded. For example, if the Max Pages value is set to 100, then eCapture will generate placeholders for all the documents that have more than 100 pages.
During Export, pages with no text are handled the same as a regular Export Job. Placeholders may be created for these pages if desired. Searchable PDFs, including hit highlighting, are not affected by the two Text options.
Data-Extract Job-Specific Actions
Action: The action to be taken for items that meet the rule criteria at the Data Extract Job level for the selected case (project).
-
Data Extract - Performs text and metadata extraction on the files.
-
Text Placeholder - Creates an extracted text placeholder text file to replace any text that would be extracted but still includes a link to the native file.
-
Remove - Removes the document from the results.
Category: Select an existing category or enter a category. The category is applied to the effective rule. Once the category is entered, it is available from the pick list for newly defined rules.
Set QC Flags: Use QC flags to organize data and create Export Sets in QC. The QC flag is set when the rule action is applied. Click
 to open the
New Flag dialog. Type the new flag and click OK. Newly created flags will
display in the QC job and allow filtering on the flag. Specify whether
you want the affected files to be assigned a QC flag during processing. You cannot set QC
Flags for the Remove type of Action.
to open the
New Flag dialog. Type the new flag and click OK. Newly created flags will
display in the QC job and allow filtering on the flag. Specify whether
you want the affected files to be assigned a QC flag during processing. You cannot set QC
Flags for the Remove type of Action. -
-
Define a scope for the rule. The Scope is the level on which the document and its relationships must match the rule in order for the rule to apply.
- If the Process Job Duplicates and/or the Data Extract Job Duplicates options are not selected under the General Criteria tab, then one of four different scope criteria can be selected:
-
Apply this rule to all items in a family if the parents match: The action will be performed on a file if the criteria match that file's parent. To look at it from the other direction, if a parent file matches a rule's criteria, the action of that rule will be applied to that parent document and all of its children. This may be used in a de-duplication Rule.
-
Apply this rule to all items in a family if at least one item matches: The action will be performed on a file if the criteria match any item in that file's family. In other words, if a file matches a rule's criteria, the action of that rule will be applied to all files in the family (parents and siblings). This may NOT be used in de-duplication Rules.
-
Apply this rule to all items in a family if ALL items match: The action will be performed on a file if the criteria match ALL items in that file's family. This may NOT be used in de-duplication Rules. This option is useful for keyword filtering.
-
Treat items in a family separately: The action will be performed only on files where the Rule criteria match that particular file. Other members of that file’s family are not considered. This may be used in a de-duplication Rule.
- If the Process Job Duplicates and/or the Data Extract Job Duplicates options are selected under the General Criteria tab, the Scope options change to:
- Maintain family structure
-
Treat documents individually
For more information about these two options, click
here.- Maintain Family Structure: The action will be performed on a file if the criteria
match the file or the file's parent. To look at it from the other direction,
if a parent file matches a Rule's criteria, the action of that Rule will
be applied to that parent document and all of its children. Only
an entire family of documents are considered duplicates. If a parent
document is not identified as a duplicate, but its child document is,
no documents would be identified as a duplicate and hence no documents
removed.
Allow Child Originals: If the Process Job Duplicates or Data Extract Duplicates option is checked and the Scope is set to Maintain Family Structure, you have the option to check the Allow Child Originals check box. This option controls how child documents are compared during de-duplication. This allows documents, including loose files, to de-duplicate against child documents predicated on the order they are processed. For example, if two Word documents exist with the same MD5Hash value, one as a child attachment to an Email parent, the other as a loose Parent, the loose Parent (Word document) is removed. However, if the loose Parent (Word document) is encountered before the Email (parent) and its Word (child attachment) the Word (child attachment) is not removed. Leave this option unchecked to force duplicate checks at the parent level only.
Note: A system-level default can be set by updating the DedupAllowChildOriginals column in the ConfigurationProperties table in the configuration database to either true or false. However, the setting in the Flex Processor rule takes precedence.
If the Maintain Family Structure option is checked:
Child items still inherit the status of the parent. If the parent is de-duplicated, the child is also de-duplicated.
Loose (independent) files can still be filtered if they match the rule criteria or are not selected by rule criteria (no Effective Rule). With de-duplication enabled, loose files will always be checked against parent documents, but have the potential to be checked against child documents ONLY if the parent/child combination are marked as "originals". If the loose file is marked as an original the parent document will still be checked against the loose file, but the child document will not because it inherits its parent's status due to the selected Family Scope.
For example:
EM1 (e-mail) as 3 attachments, Doc1_Att, Tiff1_Att, & Excel1_Att. Two independent files, Tiff1 & Excel1, are duplicates of Tiff1_Att and Excel1_Att. The documents are selected in this order:
EM1
Doc1_Att
Tiff1_Att
Excel1_Att
Tiff1
Excel1
Assuming the parent is not a duplicate, it is then considered an original, as are all of its children. When the loose documents are checked, they are checked against all files, including the children. Because they are duplicates of two of the attachments, they are removed.
If the documents are selected in this order:
Tiff1
Excel1
EM1
Doc1_Att
Tiff1_Att
Excel1_Att
the loose files are now considered originals. The parent is checked against these two files; it is not a duplicate, so it is not removed. The attachments, though duplicates of the loose files, inherit the status of the parent, and are also not removed.
-
Treat Documents Individually: The file is evaluated independent of its family. Any document can be considered a duplicate regardless if it is a parent document or a child document.
EM1 (e-mail) selected for processing
EM1 is selected to process.
Doc1 is selected to process as child of EM1 unless a duplicate, not selected if a duplicate.
Tiff1 is processed as child of EM1 unless a duplicate, not selected if a duplicate.
Excel1 is processed as child of EM1 unless a duplicate, not selected if a duplicate.
EM1 not selected (filtered, not a search result, or a duplicate)
EM1 not selected to process.
Doc1 is selected to process as normal document unless a duplicate, not selected if a duplicate.
Tiff1 is selected to process as normal document unless a duplicate, not selected if a duplicate.
Excel1 is selected to process as normal document unless a duplicate, not selected if a duplicate.
- Maintain Family Structure: The action will be performed on a file if the criteria
match the file or the file's parent. To look at it from the other direction,
if a parent file matches a Rule's criteria, the action of that Rule will
be applied to that parent document and all of its children. Only
an entire family of documents are considered duplicates. If a parent
document is not identified as a duplicate, but its child document is,
no documents would be identified as a duplicate and hence no documents
removed.
-
Specify the criteria for the rule. For rule criteria, you can define General, Date, Search, and Advanced Criteria. See the related sections below for more information on defining this criteria.
-
Click
 to preview the results of the rule without applying the specified Action. For more information about Preview Results, click here.
Initially the option displays a rule application status bar on top of the Flex Processor dialog’s title bar. For large rule sets, the rule application status bar will remain for several seconds to show the status of rules applied. If necessary, click Cancel to return to the Flex Processor dialog and to cancel the rule application.
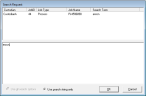
The Flex Processor Preview dialog appears after the rule application status bar closes and applies each rule to the data collection. The Flex Processor Preview displays an Item level report for the rules as well as the number of Records. Use this Preview to verify the accuracy of the rules and their desired results. The following image shows the Preview fields.

These results can be saved to a .CSV file for distribution.
-
Click
 to save the rule.
Note: If you want to discard changes that you made to a rule, click
 .
. - Click the
 button to open the Rule Set Management Wizard. For more information, see Manage Rules Sets Using the Rule Set
Management Wizard.
button to open the Rule Set Management Wizard. For more information, see Manage Rules Sets Using the Rule Set
Management Wizard. -
Click the
 button to view
a dialog that gives an example for setting a rule.
button to view
a dialog that gives an example for setting a rule.
Note: Throughout the Flex Processor Rules Manager, you will see a blue icon question mark
 icon appear as you mouse over
(or near) different options. Click to display
a pop up with information about the options..
icon appear as you mouse over
(or near) different options. Click to display
a pop up with information about the options.. - If you want to delete one of the rules in the Rules List, at the top of the dialog, select the rule you want to delete and click the
 button. A confirmation dialog appears asking if you want to remove the selected
rule. Click Yes.
button. A confirmation dialog appears asking if you want to remove the selected
rule. Click Yes. - Click the
 button to exit the Flex Processor Rules Manager dialog and return to the Filtering tab.

![]() Define the General Criteria for a Flex
Processor Rule
Define the General Criteria for a Flex
Processor Rule
When you first create a Flex Processor Rule, you set basic rule information and then, if necessary, add general criteria for the rule.

To define General Criteria for a Flex Processor Rule:
-
Check the All Files option if you want to apply the rule to all of the files in the Processing or Data Extract Job. This option is typically used for the first Rule in a Rule set so you can start with everything and then remove or placeholder certain files based on more specific criteria. From the Action drop-down list select Image (if a Processing Job) or Data Extract (if a Data Extract Job).
The All Files option is an exclusive criterion (it cannot be combined with other criteria).
-
(Optional) Select Process Job Duplicates and/or Data Extract Job Duplicates and then select the level from their respective drop-down lists. (Selecting one or both of these options enables de-duplication.) The options are:
-
Current: documents which are duplicates of the current document only will be removed
-
Custodian: documents which are duplicates of any document within the custodian will be removed
-
Case (Project): documents which are duplicates of any document within the case (project) will be removed
-
Client: documents which are duplicates of any document within the client will be removed
Duplicates are determined by matching the MD5 hashes of files.
- If Advanced Duplicate Checking is enabled, then MD5 hash matches are verified with bit-by-bit comparison before being flagged as a match.
-
File Name Match requires that the filenames of the two files (loose files only, not e-mails) must be the same. Bit-by-bit comparison and file name comparison do not occur for e-mail types.
Note: If de-duplication is selected all other criteria is not available.
- A file is checked for duplication when a job starts. At this time, the SelectionIDs are assigned to the documents. These SelectionIDs are closely tied with the order that the documents were discovered. Documents are distributed to workers and it is at this time that the document is checked against all previously "processed" documents (the originals) in line with the selected scope and duplication options.
- Ensure the appropriate Action is selected. If necessary, determine whether or not a de-duplication flag should be set.
-
-
If you selected Process Job Duplicates and/or Data Extract Job Duplicates, set the Scope options:
- Maintain Family Structure: The action will be performed on a file if the criteria
match the file or the file's parent. To look at it from the other direction,
if a parent file matches a Rule's criteria, the action of that Rule will
be applied to that parent document and all of its children. Only
an entire family of documents are considered duplicates. If a parent
document is not identified as a duplicate, but its child document is,
no documents would be identified as a duplicate and hence no documents
removed.
Allow Child Originals: If the Process Job Duplicates or Data Extract Duplicates option is checked and the Scope is set to Maintain Family Structure, you have the option to check the Allow Child Originals check box. This option controls how child documents are compared during de-duplication. This allows documents, including loose files, to de-duplicate against child documents predicated on the order they are processed. For example, if two Word documents exist with the same MD5Hash value, one as a child attachment to an Email parent, the other as a loose Parent, the loose Parent (Word document) is removed. However, if the loose Parent (Word document) is encountered before the Email (parent) and its Word (child attachment) the Word (child attachment) is not removed. Leave this option unchecked to force duplicate checks at the parent level only.
Note: A system-level default can be set by updating the DedupAllowChildOriginals column in the ConfigurationProperties table in the configuration database to either true or false. However, the setting in the Flex Processor rule takes precedence.
If the Maintain Family Structure option is checked:
Child items still inherit the status of the parent. If the parent is de-duplicated, the child is also de-duplicated.
Loose (independent) files can still be filtered if they match the rule criteria or are not selected by rule criteria (no Effective Rule). With de-duplication enabled, loose files will always be checked against parent documents, but have the potential to be checked against child documents ONLY if the parent/child combination are marked as "originals". If the loose file is marked as an original the parent document will still be checked against the loose file, but the child document will not because it inherits its parent's status due to the selected Family Scope.
For example:
EM1 (e-mail) as 3 attachments, Doc1_Att, Tiff1_Att, & Excel1_Att. Two independent files, Tiff1 & Excel1, are duplicates of Tiff1_Att and Excel1_Att. The documents are selected in this order:
EM1
Doc1_Att
Tiff1_Att
Excel1_Att
Tiff1
Excel1
Assuming the parent is not a duplicate, it is then considered an original, as are all of its children. When the loose documents are checked, they are checked against all files, including the children. Because they are duplicates of two of the attachments, they are removed.
If the documents are selected in this order:
Tiff1
Excel1
EM1
Doc1_Att
Tiff1_Att
Excel1_Att
the loose files are now considered originals. The parent is checked against these two files; it is not a duplicate, so it is not removed. The attachments, though duplicates of the loose files, inherit the status of the parent, and are also not removed.
-
Treat Documents Individually: The file is evaluated independent of its family. Any document can be considered a duplicate regardless if it is a parent document or a child document.
EM1 (e-mail) selected for processing
EM1 is selected to process.
Doc1 is selected to process as child of EM1 unless a duplicate, not selected if a duplicate.
Tiff1 is processed as child of EM1 unless a duplicate, not selected if a duplicate.
Excel1 is processed as child of EM1 unless a duplicate, not selected if a duplicate.
EM1 not selected (filtered, not a search result, or a duplicate)
EM1 not selected to process.
Doc1 is selected to process as normal document unless a duplicate, not selected if a duplicate.
Tiff1 is selected to process as normal document unless a duplicate, not selected if a duplicate.
Excel1 is selected to process as normal document unless a duplicate, not selected if a duplicate.
- Maintain Family Structure: The action will be performed on a file if the criteria
match the file or the file's parent. To look at it from the other direction,
if a parent file matches a Rule's criteria, the action of that Rule will
be applied to that parent document and all of its children. Only
an entire family of documents are considered duplicates. If a parent
document is not identified as a duplicate, but its child document is,
no documents would be identified as a duplicate and hence no documents
removed.
- (Optional) Check Allow Child Originals. Allows documents, including loose files, to de-duplicate against child documents. If unchecked, forces duplicate checks at the parent level only. This option is disabled for the Scope: Treat documents individually
-
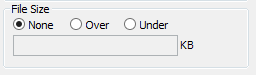
(Optional) Check File Size. When File Size is selected for a rule, it applies to the files in the Processing or Data Extract Job which have sizes on disk either greater than or equal to, or less than or equal to, the size specified. The size is expressed in KB. For example, a 1 MB file will be entered as 1024 KB.
-
(Optional) Check File Types. In the File Types section you can check the file types affected by the rule. eCapture recognizes documents by their actual content and not the file extension. Keep this in mind as you exclude/include file types for a Processing or Data Extract Job. You can filter (exclude) a myriad of file types by simply selecting the file type check box. When the Processing or Data Extract Job runs, it will process only those file types that you want and exclude all others that you selected in the Filters dialog box.
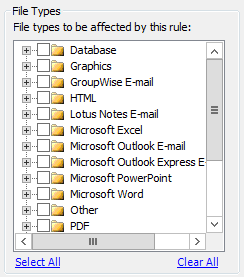
For example, you discovered a directory containing 15 different types of files. Some of these files were word processing documents. You want to run a Processing Job that includes only Microsoft Word documents.
There is a separate category for Microsoft Word documents (and subcategories of all the versions of Microsoft Word under the Microsoft Word category) as well as a separate generic Word Processing category which contains subcategories of all other word processing file types such as Lotus Word Pro, WordStar, .RTF, etc. If you check only the box next to Microsoft Word, you would automatically exclude any other type of word processing files that exist in the Discovery Job that you selected. The Processing Job will process those documents that it recognizes as Microsoft Word documents based on their actual content.
These file types are based on the Oracle® Outside In Technology (formerly Stellent) identification criteria.
Click Select All to select every file type.
Click Clear All to clear all the selected file types.
-
(Optional) You can also specify specific extensions of files you want to be affected by a given rule. Click the
 button to add the extension to the list. Repeat for each extension.
 -
(Optional) To import a list of file extensions from a .CSV file, click the
 button. Select the .CSV file
and click Open.
button. Select the .CSV file
and click Open. An Import From File progress bar appears. If any errors were encountered during the import, such as duplicates, an Information dialog box appear with the errors.
- The .CSV file may contain extensions with or without . (period).
- Make sure that the .CSV file contains only one column of file extensions with each extension occupying its own row, e.g. Range A1 through A50 or Range E1 through E50.
- The file extensions are alphabetized upon import into the Flex Processor.
-
If you want to remove a specific extension from the list, select the extension and click the
 button.
 - Click the
 button to remove all extensions from the list.
![]() Define the Date Criteria for a Flex Processor
Rule
Define the Date Criteria for a Flex Processor
Rule
You can set date criteria on a rule, which will narrow the discovery to files based on a specific date range.
|
|
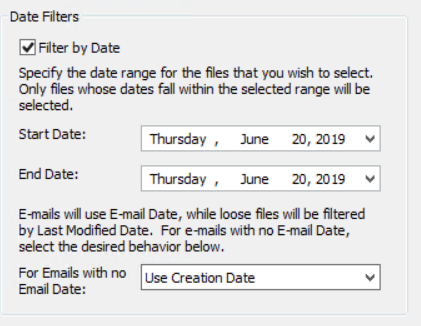
Note: E-mails will use E-mail Date, while loose files will be filtered by Last Modified Date. For e-mails with no E-mail Date, you may select a behavior from the drop down list as described in step 3 below. |
To define Date Filters:
- Select the Filter by Date option.
-
Specify the date range (Start Date and End Date) for files that you want to select. Only files whose dates fall within the selected range will be selected during discovery sessions. Note: If the work is ongoing, use an end date as far into the future as possible so you may re-use the Rule, if necessary. The filter starts/ends at midnight on the selected date. If the Start Date is 2/12/2004, this includes files created on or after 2/12/2004. Similarly, if the End Date is 2/20/2004 this includes files created on or before 2/20/2004.
-
(Optional) For e-mails with no E-mail Date, select from one of the following behaviors:
-
Use Creation Date
-
Use Last Modification Date
-
Always Include
-
Never Include
-
![]() Define the Search Criteria for a Flex
Processor Rule
Define the Search Criteria for a Flex
Processor Rule
You can define Search Criteria to be used when a Flex Processor Rule is executed. If you do not run a search, then every item from the Discovery Job will be selected. Otherwise, you can run a search and specify the search criteria when creating Data Extraction Jobs or Processing Jobs.
The search filters the Data Extraction and Processing Job results according to text contained within the files.
|
|
Important: If the option, Create dtSearch index during initial discovery, was cleared for a new Discovery Job, then searching is not available for a new Processing or Data Extract Job that includes that non-indexed Discovery Job. |

To define the Search Criteria for a Flex Processor Rule:
- In the Search Request box, enter the search phrase or the search words. During a word search, parents are automatically selected when a child meets a search requirement. The family settings determine this behavior.
-
Click
 located in the upper right portion of the Search Request box to display
the Search Request dialog box. This dialog box shows a
list of previously run searches conducted for a Case's (Project’s) Processing
and/or Data Extract Jobs and the search strings for each of the Processing
and/or Data Extract Jobs. The Search Request dialog
box can be dragged around the desktop and resized if necessary.
located in the upper right portion of the Search Request box to display
the Search Request dialog box. This dialog box shows a
list of previously run searches conducted for a Case's (Project’s) Processing
and/or Data Extract Jobs and the search strings for each of the Processing
and/or Data Extract Jobs. The Search Request dialog
box can be dragged around the desktop and resized if necessary.This feature allows you to use the same search options and search string for a new Processing and/or Data Extract Job rather than manually selecting the search options again and retyping in the same search string.
Note: If you cancel out of this dialog box, then the search terms remain unchanged.
-
Select the search item in the listview screen. When you select it, you will see its search string displayed in the text box below.
Note: Clicking a search item in the listview will replace whatever is in the textbox with the search string of the selected search.
-
Select one of the following options:
-
Use all search options - to use the search options that were selected for that search item.
-
Use search string only - to change only the search string.
-
-
Click OK to replace the search form’s search string with the current contents of the search request textbox. When you click OK, the Search Criteria tab displays again. You can modify the search options, if necessary.
- Continue selecting additional options in the Flex Processor Rules Manager. The search will be added to the listview in the Search Request dialog box. You may then select that search item for a future search.
-
Set the Search For option. For more information, click
here.
There are 4 options under Search for: Any Words, All Words, Boolean-Search (and, or, not, ...), and Natural Language. Only one can be selected at a time.
-
Any Words: This search request is for unstructured natural language or "plain English" queries. The Boolean operators AND & OR are disregarded. Examples follow:
-
Quotation Marks: You may use "quotation marks" around phrases.
For example, "personal computer". Quotes are used when the search requires that the words are contiguous and in the order they are indicated.
-
Plus + and Minus - Signs: Add + in front of any word or phrase to require it. Add - in front of any word or phrase or to exclude it.
Example: "personal computer" -monitor +"flash drive"
-
- All Words: This search request is similar to Any Words (previous bullet item), with the exception that all of the words in the search request must be present for a document.
-
Boolean Search: Activates and, or, not, w/5, w/25, and fields under the Search Request box. Use these as you compose your search request. The following table describes Boolean examples/interpretations and additional search options.
Examples of Boolean Search Terms
Boolean Usage Example
Interpretation
computer and monitor
both words must be present
computer or monitor
either word can be present
computer w/5 monitor
computer must occur within 5 words of monitor
computer not w/5 monitor
computer must occur, but not within 5 words of monitor
computer not monitor
only computer must be present
[fieldname] contains smith
the field name must contain smith
computer w/5 xfirstword
computer must occur in the first five words
computer w/5 xlastword
computer must occur in the last five words
-
-
Use Special Characters, if necessary.
Use ? to match any single character. For example, appl? matches apple or apply
Use * to match any characters. For example, m*g matches mustang, morning, mug, etc.
~~ matches a numeric range. For example, 14~~18 looks for 14, 15, 16, 17, or 18
-
Click
 to display the Search Fields dialog box.
-
Select the metadata field from the list and click OK. For example, if you selected Filename, the Search Request box would contain the following:

From the Search Request box: (Filename contains ( ))
The cursor automatically appears between ( )) ready for an entry. Enter the filename. The finished result would look like this:

From the Search Request box: (Filename contains (ProfessionalReport.doc))
- To select an additional metadata field, click and repeat
the above instructions.
-
To search for dates, email addresses, or credit card numbers:
Ensure that the option, Recognize Dates, Email Addresses, and Credit Card Numbers, is selected under Search Indexing in the Discovery Options dialog box for the relevant Discovery Job(s). See Modify a Completed Discovery Job for more information.
To search for dates (in various formats), email addresses (complete or partial addresses), or credit card numbers, enter:
-
date() e.g. date(jan 15 2006) or date(15 Jan 06) or any of these other formats:
date(2006/01/15)
date(1/15/06)
date(1-15-06)
date(The fifteenth of January, two thousand six)
-
mail() - e.g. mail(sales@iprotech.com) or mail(s*@iprotech.com)
-
creditcard() - e.g. creditcard(5555 6666 9999 3333) or any of these other formats:
creditcard(5555666699993333)
creditcard(5555-6666-9999-3333)
-
-
Check the Natural Language option if you want to enter natural language text. This option automatically weights the words in an "Any Words" search to disregard words such as AND and OR and focus on the more relevant, less frequently found words. For example, enter the terms Find the memo on ski-induced paralysis to weight "ski-induced" and "paralysis" very high in the search results, helping to weed out hits for "memo".
-
Check Stemming to extend a search to cover grammatical variations. Use ~ at the end of the word to search for stemming variations. For example, enter the terms fish~ swamp applied~ to find fish, fishing, swamp, as well as applying, applies, and apply.
Stemming rules are designed to work with the English language. They are stored in the stemming.dat file in the dtSearch folder. The default path starts with the directory you indicated during the eCapture installation followed by \Shared\dtSearch.
-
Check Phonic to look for words that sound like the word you entered in the search request. For example, enter #Smith to find Smith, Smithe, and Smythe.
For best results, use a # in front of individual words to be searched phonically. If you simply select Phonic searching under Search Features, the search will apply phonic rules to all words and can return too many inappropriate results.
- Check Synonyms to find synonyms established by eCapture’s dtSearch function or user-defined. Use & at the end of the word to search for its synonyms. For example, enter watchful& monitor to search for the word watchful or its synonyms and/or the word monitor (without synonyms).
- Check the Related Words option to support synonym searches. Standard synonyms and related words are supplied by WordNet (supplied with dtSearch and built into eCapture).
- Check Fuzzy Searching to find words even if they are misspelled. A search for alphabet with a fuzziness of 1 would also find alphaqet. With a fuzziness of 3, the same search would find both alphaqet and alpkaqet. It is useful for text that may contain typographical errors or that has been scanned and OCRed. Use the slide meter to adjust the fuzzy search level.
- Check Include Non-indexed Files as Matches to pull all Non-Indexed files that dtSearch could not Index and whose hits could not be applied. This is a useful option because it can create and apply a flag, such as NON-Indexed File, and then export out only this data collection for review in order to verify that no Privileged or Hot documents were missed. File examples include: PDFs, Graphics, JPEGs, TIFFs, etc.
- Click Apply Language Analyzer and create a new rule if you have a job that requires multi-language capability handling. For example, CJK (Chinese, Japanese, Korean) text appears as lines of characters with no spaces between the words. The Language Analyzer provides a way to add customized word breaking and morphological analysis (components, morphemes, which comprise words) to the dtSearch engine. The ApplyLanguageAnalyzer field (FilterManager) carries over to rules for importing, exporting, and Master Rules operations. This option is disabled by default.
-
Click
 to display the Search Status dialog. The Rule ID is displayed in the Title
Bar. Immediately after the search progress completes, the Search Hits
Preview dialog appears. (Note: Not available if the Discovery Job is not
completed.) The Search Hits Preview dialog displays the following search
results in a grid format for each file that meets the criteria:
to display the Search Status dialog. The Rule ID is displayed in the Title
Bar. Immediately after the search progress completes, the Search Hits
Preview dialog appears. (Note: Not available if the Discovery Job is not
completed.) The Search Hits Preview dialog displays the following search
results in a grid format for each file that meets the criteria:-
ItemID
-
Name of the File
-
Score (Percentage Value)
-
Hits - total number of search terms that appear in a single document. For example, the number 7 may indicate that a single term appeared 7 times in the document or that 2 terms appeared a total of 7 times: one term 3 times and the other term 4 times.
-
Location (File’s path)
-
Size of the File
-
- Select an item and click
 to view the file in its
native application. The native application must be installed on the workstation.
If it is not, the Windows dialog box appears with a message stating that
"Windows cannot open this file:" and offers additional options
for opening the file.
to view the file in its
native application. The native application must be installed on the workstation.
If it is not, the Windows dialog box appears with a message stating that
"Windows cannot open this file:" and offers additional options
for opening the file. - To save the results to
a .CSV file, click
 to open
the Save As a .CSV File dialog. Navigate to the location to save the file.
Accept or change the default filename. Click Save.
to open
the Save As a .CSV File dialog. Navigate to the location to save the file.
Accept or change the default filename. Click Save.


![]() Define the Advanced Criteria for a Flex
Processor Rule
Define the Advanced Criteria for a Flex
Processor Rule
You can define advanced criteria for a given Flex Processor Rule. These settings identify files for action mapping. These different selection types depend on hash values or Item IDs, which need to be identified in order to be used. NIST NSRL files have already been identified through NIST. The following procedure describes how to set the Advanced Criteria for a given rule.
|
|
Important: When loading or importing lists, the existing list is overwritten. If you want to import more than one list, create a separate, additional rule. |
-
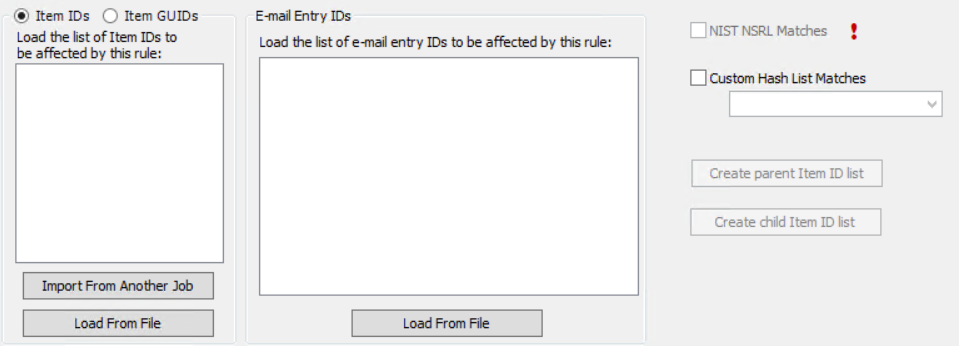
If desired, click on the ItemIDs option or the ItemGUIDs option.
-
Filtering by ItemID is typically done when producing files that were part of previous jobs from the same Client. Because ItemIDs apply only within a given Client, importing ItemID lists from other Clients will lead to incorrect results. Importing of Item IDs is useful for targeted TIFFing.
Note: Item ID list rules will not transfer to other jobs, master rule sets, or case (project) default options. The original item IDs associated with the native files that were included in the selected Discovery job or jobs can be loaded for use in a rule.
- Filtering by ItemGUIDs (Globally Unique Identifiers) gives a more reliable method to positively identify eCapture Items records for a Client.
-
- Click either the
 button or the
  button.
 -
When you select Import From Another Job, the Import from Job dialog displays.

- Select the job you want to import from.
-
Select either:
-
Items Processed - Specify which statuses (e.g. Queued, Error, etc.) to import.
-
Items with no effective rule - This option allows for the capability of using all items not in the results of the selected job.
The Flex Processor Rules Manager will then place the Item IDs that meet those criteria into the list.
-
- Select Load from File if you want to load a file of Item IDs into a rule. The file’s format should be one Item ID per line, with no punctuation. Only the ItemIDs that are already part of the selected Discovery Jobs of the current Job will be included. Use the Data Extract Import option when creating a new Job to automatically select Discovery Jobs based on the ItemIDs.
-
If you want to import a list of IDs into the Flex Processor Rules Manager to produce just the desired files from the same PST, click the Load From File button below the E-mail Entry IDs box. A rule with a list of E-mail Entry IDs loaded will apply to the files in the Processing and Data Extract Jobs whose e-mail entry IDs are an exact match.
- The file’s format is one EntryID per line, with no punctuation. If the PST from which the entry IDs were extracted is not part of the job, there will be no matches for the rule.
- Flex Processor Rules Manager will match the filenames, without extensions, with the EntryID imported from the file.
Note: This will not extract files from the containers; nor is it effective for removing e-mail.
-
If desired, check the NIST NSRL Matches check box. The optional NIST database must be loaded and set up for use with eCapture in order to use this feature. A rule with this selected will apply to the files in the Processing or Data Extract Job whose MD5 hashes match those of files in the NSR Library published by NIST. It is typically used in a Remove rule to eliminate non-responsive files such as OS files.
The option will be disabled unless the NIST match was completed on all Discovery Jobs that contribute to this Process Job/Data Extract Job. If not all of the discovery jobs have been NIST Matched, the following information message displays when you hover over the exclamation point next to the NIST check box.


Important: This is an exclusive criterion (it cannot be combined with other criteria).
-
If desired, check the Custom Hash List Matches check box and then select the HASH list from the drop down menu. The hash lists must be loaded before using this feature.
- In most cases, the Action will either be Remove or Placeholder. Multiple Custom Hash Lists can be used on one Job; however, a separate rule must be created for each list.
- When the Job is processed, the MD5 hashes of the times in the job will be matched against the MD5 hashes of the entries in the Custom Hash List. Any matching items will have the appropriate action applied. At this point, the later rules will supersede the earlier rules.
- In most cases, this option is used with the action of either Remove or Placeholder. Multiple Custom Hash Lists can be used on one Job; however, a separate rule must be created for each list.
Important: This is an exclusive criterion (it cannot be combined with other criteria).
-
Click
 or
or  to load all Parent item
IDs or Children item IDs (respectively). The Scope rule is automatically
changed to Treat items in a family separately to
ensure desired output. Changing the scope rule may produce incorrect output.
to load all Parent item
IDs or Children item IDs (respectively). The Scope rule is automatically
changed to Treat items in a family separately to
ensure desired output. Changing the scope rule may produce incorrect output. - A Parent item ID rule loads the item IDs for the parent documents. This essentially suppresses embedded file extraction items from being processed.
- The Child item ID rule loads the item IDs for the attachments. This option allows for attachments to be exported or to be used as a last rule to remove attachments and maintain parent (top level) item IDs only. The processing would be matched to the original source media.
These rule options are used in conjunction with the Export option, Use filename for Image Key (located in the last export wizard screen when running an export job), in order to maintain the original document numbering as the file goes through each phase in eCapture.
Important: This feature is grayed out and not available until the Discovery Job has completed.
Related Topics
Overview: Flex Processor Rules Manager
Create Rules By Using the Flex Processor Rules Manager Wizard